Summary
Last updated on May 14th, 2021 at 03:35 pm
Update: GTmetrix has removed the YSlow tab from the default analysis section and along with it the DNS Lookups audit which revealed what domains you should be pre-fetching. This article was updated to include how to get back to these legacy options.
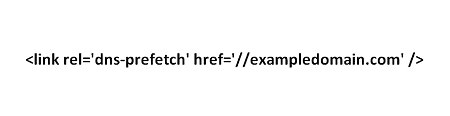
DNS-Prefetch tags are meta tags that can make it appear to users that your website is loading faster than it really is. This is because dns-prefetch commands a browser to ‘fetch’ the DNS information for any third party domains used to display content on a page.
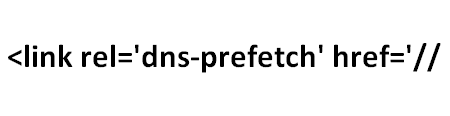
A dns-prefetch tag looks like this
1. Finding Domains to Prefetch
Before you can add any dns-prefetch tags you’ll need to know what 3rd party domains you want to prefetch. You’ll want to examine your theme for any existing dns-prefetch tags and then use a tool to figure out what third party domains your theme loads content from.
Finding what domains you currently have pre-fetched:
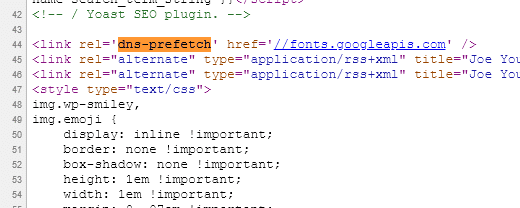
Many Shopify themes come equipped with dns-prefetch tags. Some of the most commonly used are; https://fonts.googleapis.com, https://staticxx.s3.amazonaws.com/, https://cdn.shopify.com/, https://productreviews.shopifycdn.com/, https://connect.facebook.net/, and https://ajax.googleapis.com/. To determine which ones you already have simply open your website in a Chrome browser and hit ctl+U to view the source. Use ctl+F and type “dns-prefetch” into your find on page box. This should highlight what, if any, dns-prefetch tags you currently use. Here’s a look at the one’s on my blog as of writing:
Finding what domains you should add to dns-prefetch:
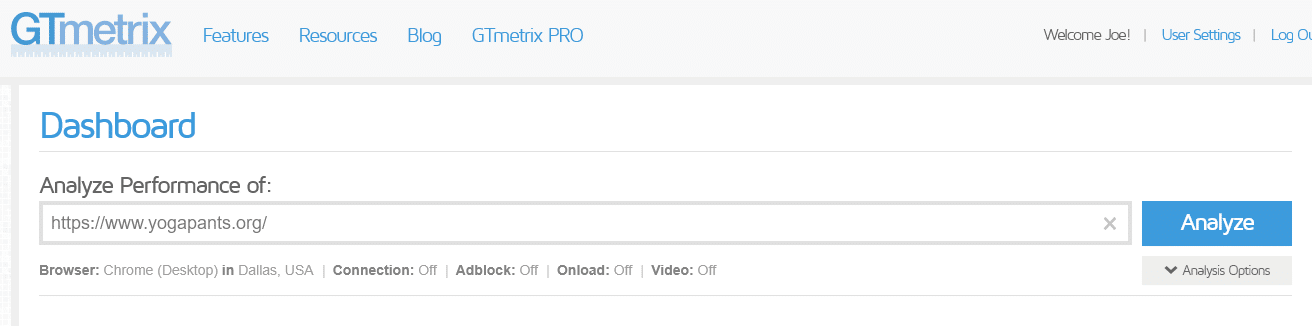
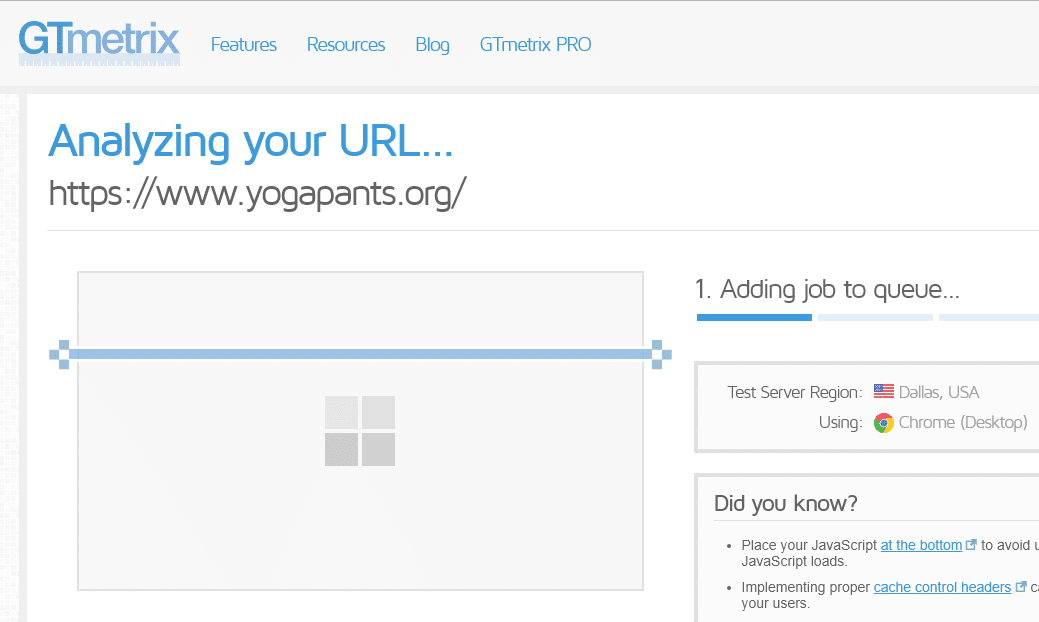
Finding domains to prefetch is simple as well. To do this we’ll be using the tool GTMetrix and examining our test Shopify website, YogaPants.org.
Using GTMetrix to find these domains is easy.
First make a free account
Then copy and paste your domain into the box on the homepage where it says “Enter URL to Analyze…”
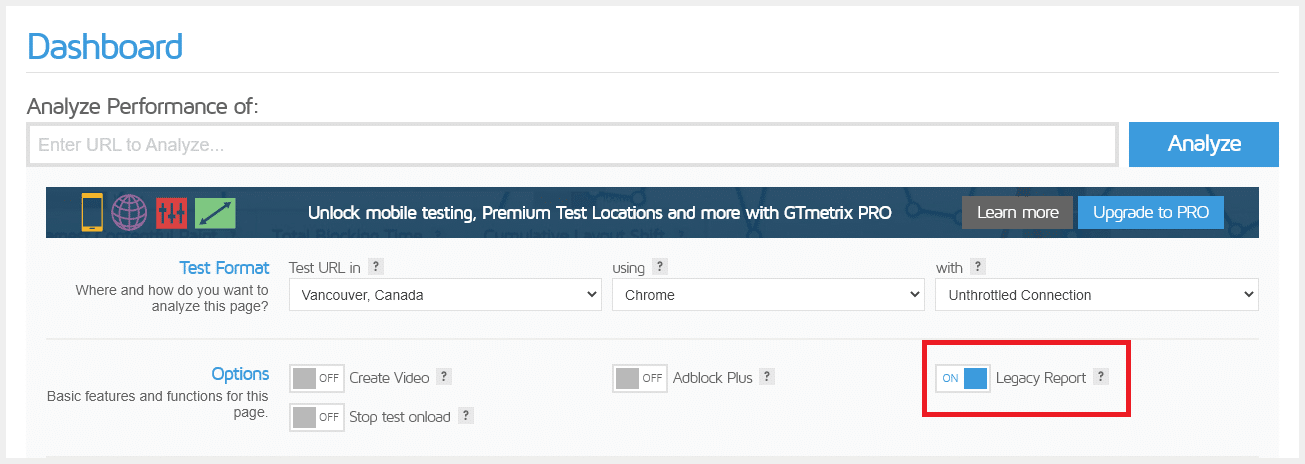
Before we start the analysis we want to toggle the legacy report back on to make it easier to find our excessive DNS requests. Click on the “Analysis Options” button below the “analyze” button.

In the options click the toggle button next to “Legacy Report” so that the button reads ‘On’.
Now click the “Analyze” button. This will start the analysis which takes approximately 30 seconds to a minute to complete.
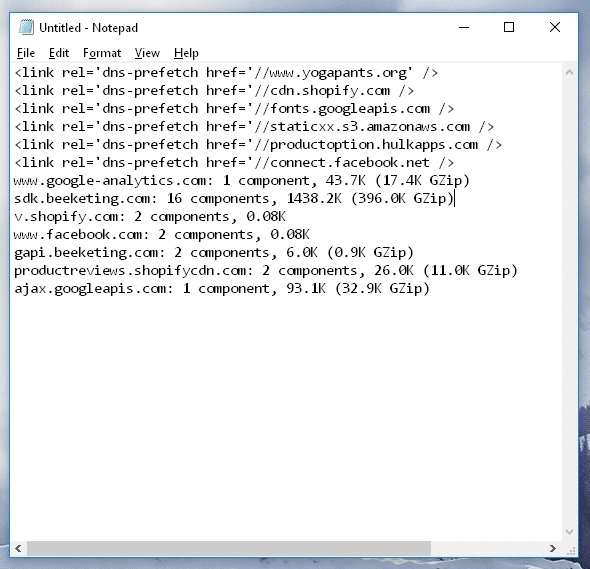
Once the analysis finishes click on the “YSlow” tab below.
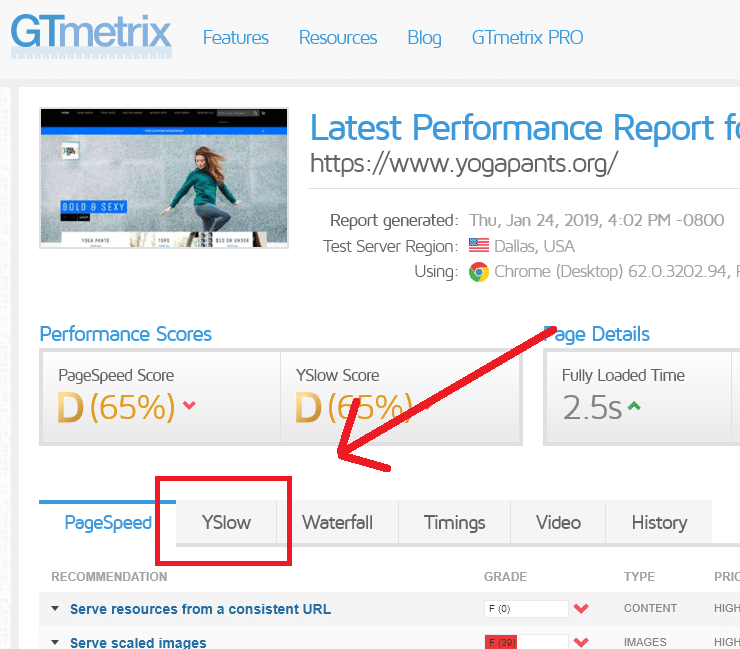
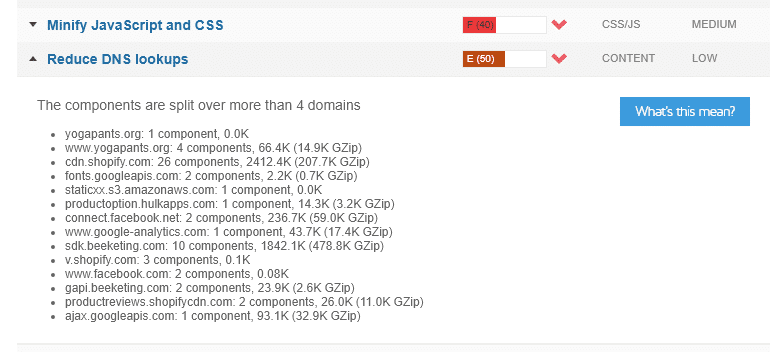
This tab will show quite a few sections, look for and click on the one that says “Reduce DNS Lookups”. Most often all third-party domains that place content on your website will be found here.
2. Format the domains into DNS-Prefetch Tags
Since the DNS prefetch tags don’t actually speed up the page’s load time (by large amounts), tools like GTMetrix won’t stop warning you about the DNS lookups. That means this list should be the full list of third-party domains that you need to make prefetch tags for.
First see if any of these are one’s you found earlier when you look at the code of your website. If so, you’ll go ahead and ignore than and instead build prefetch tags for the rest. To do this I usually start by copying the text from GTMetrix into a Notepad document or Notepad++

Now start editing these to be DNS-prefetch tags. To do this you’ll add a bit of code before the start of your domain and at the end.
You’ll add this code at the start
And this code at the end

It’s important to note that you’re replacing both https:// and http:// with just the two slashes while maintaining the subdomain. Examples https://www.exampledomain.com becomes //www.exampledomain.com and http://sub.exampledomain.com becomes //sub.exampledomain.com and http://exampledomain.com becomes //exampledomain.com.
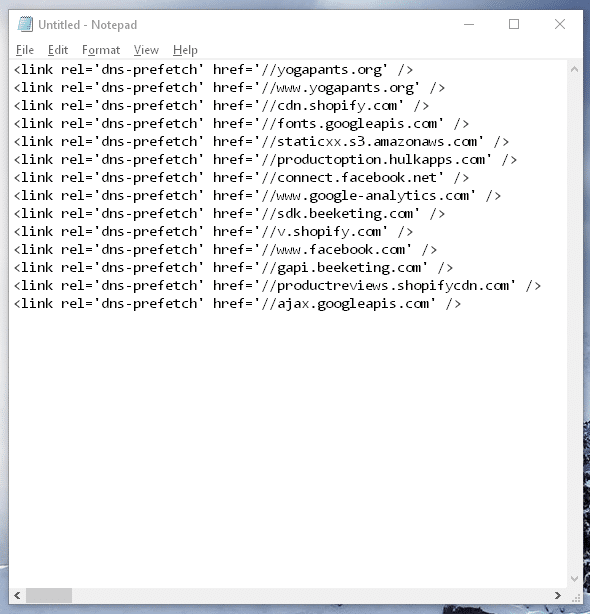
Since we’ve copied the text from GTMetrix, they’ve actually stripped out the http:// and https://, you’ll want to make sure that you add the // in front of the domains when writing the code. I’ve taken the above example and done half of them so you can see what they look like done and ready to go (at the top) and raw text from GTMetrix (at the bottom).
And here is what it looks like after we’ve completed them all
3. Adding the DNS-Prefetch Tags to Shopify
Now that you’ve made your dns-prfetch tags you’re ready to add them to your website. This part may be a little trickier than the others and remember you’ll be editing your website live so be very careful.
To add DNS Prefetch tags to a Shopify store you’ll need to edit the Theme.Liquid file. You can get to this by going to Online Store > Themes > Customize > Theme Actions > Edit Code > Theme.Liquid
Find a place high up in the HEAD section to place your code. I like to place mine just after the Viewport meta tag. Copy the finished code from your Notepad and paste it into your Theme.Liquid file. You can see what this looks like below.
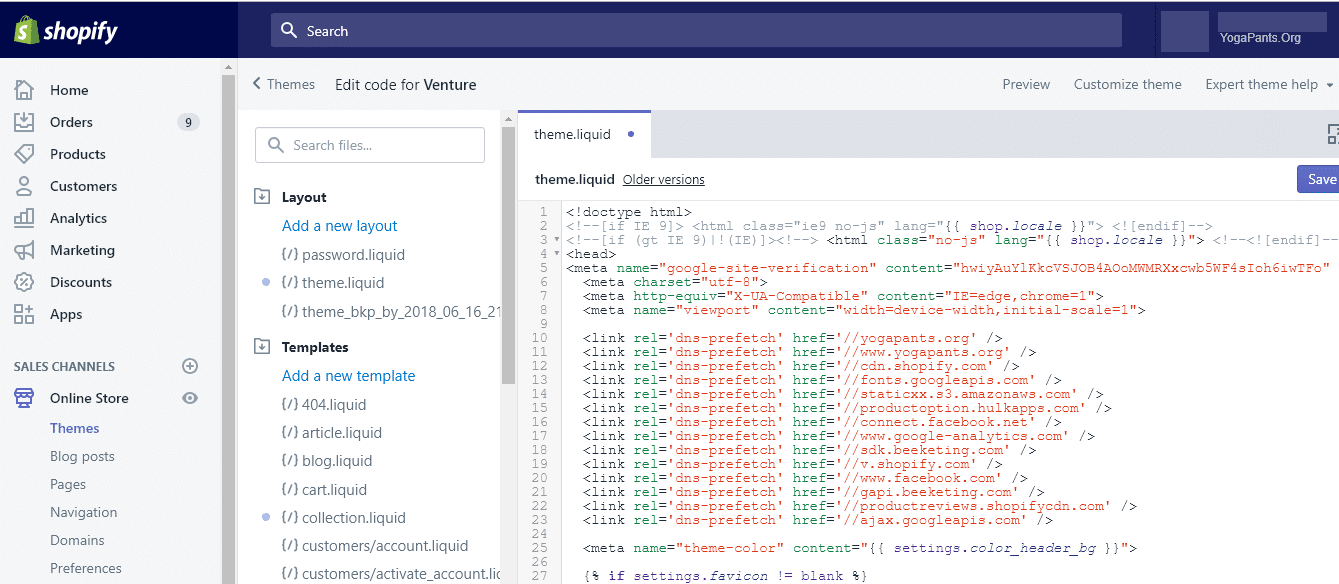
Once the code is in place click the “save” button in the upper right-hand corner. Now go check your site and make sure it loads properly. You may notice it appears to load much faster now and your customers should notice the same thing.