Summary
In this guide I’m going to detail the process and steps you need to take to install the Let’s Encrypt AutoSSL module for cPanel and to use it to automatically apply SSL certificates for any domain hosted on your server. AutoSSL was introduced in version 58 of cPanel with the initial version of AutoSSL rolling out in v57.9999.95 on June 14th 2016. The Let’s Encrypt support began getting implemented in v58.0.17 which was released on August 8th, 2016 and officially announced on August 10th, 2016. While the feature has been available for over 2 years, when I was implementing it I found a lack of thorough documentation and decided to create a guide for anyone else struggling through the install that was having similar troubles.
Steps to Install Let’s Encrypt for cPanel AutoSSL
1. Setup cPanel on your server. Sounds fairly basic, but it is important to ensure your server has cPanel installed. You’ll also need to make sure you have WHM access. If you’re on a shared server or someone else runs your hosting, you will most likely not have WHM access and therefore cannot setup AutoSSL.
2. In WHM create an account for your new website or a website you’re going to migrate over.
3. Upgrade to the latest version WHM, or at least to a version with support for AutoSSL. For AutoSSL to work you must be using cPanel/WHM v58.0.17 or higher. I upgraded to the latest version with my install as I read numerous reports of problems with previous WHM versions. Let’s Encrypt integration may not work as well with older versions of WHM’s AutoSSL, though I’m uncertain.
If you need to upgrade your WHM just know that it might go really slow, taking up to an hour or longer in some cases. Make sure you stay logged into your web host / WHM sometimes you’ll get logged out and the upgrade will stop working. The screen may freeze around 89% to 95% complete, let it sit like that for about 15 minutes and if it doesn’t update REFRESH the page. You’ll either see the log continue or you’ll see a screen asking you to setup new features of WHM.
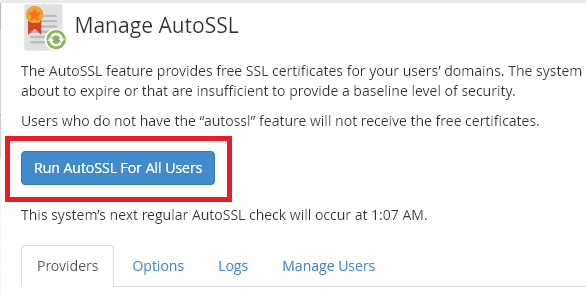
4. Once you’ve got your WHM upgraded to the latest version (or the version of choice) you can now setup AutoSSL. To do this start by searching for “SSL” or “AutoSSL” in the box on the upper-left hand corner and find the option for “Manage AutoSSL” under the SSL/TLS heading in the left-side navigation as shown below.
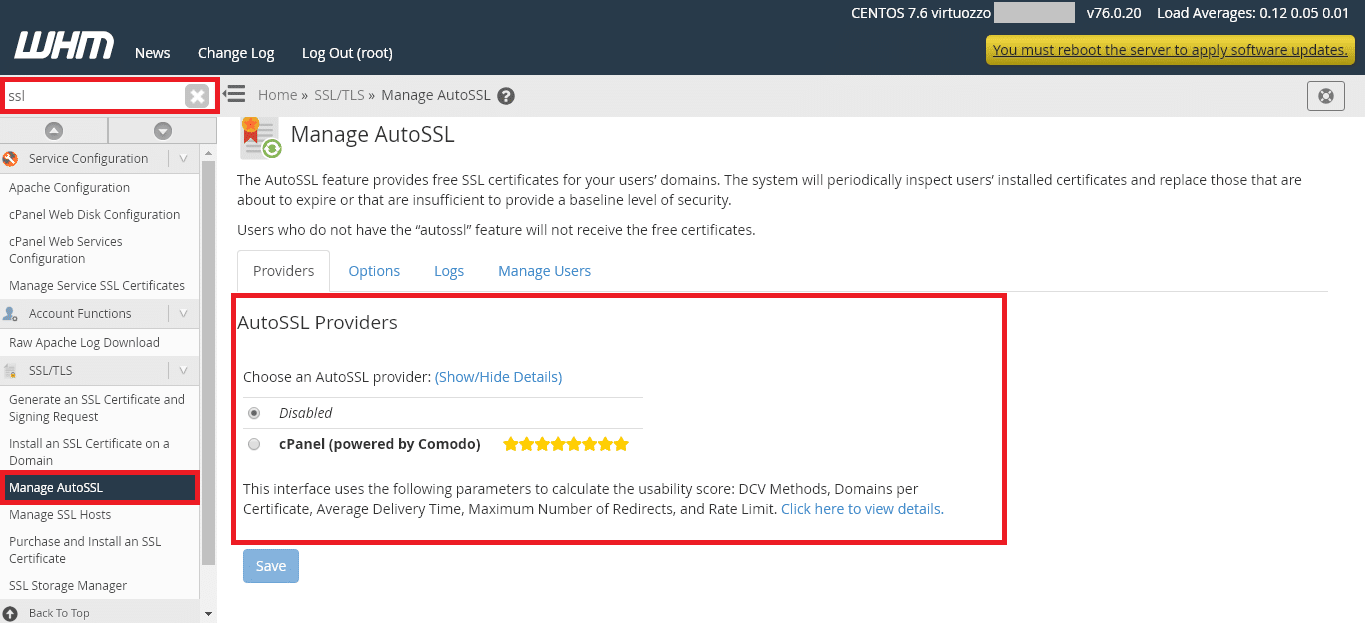
5. You’ll see the ability to enable AutoSSL or you may even see it preset to Comodo SSL, but you probably don’t see the Let’s Encrypt option in there. That’s because Comodo and cPanel have had a working relationship for several years in an attempt to make securing the web easier. You can read about that relationship from cPanel here: https://blog.cpanel.com/securing-your-site-comodo-cpanel-autossl/ and the Comodo news release here: https://www.comodo.com/news/press_releases/2016/12/worlds-largest-CA-comodo-and-web-hosting-platform-leader-cPanel.html
If you want to use the Comodo / cPanel free certificate this should be far enough. The certificates have a limitation of 200 domains (including subdomains, though it should be 1,000 soon) and have to autorenew every 90 days. Simply select the option for “cPanel (powered by Comodo)” and all domains (up to 200) on this server will now be secured automatically, there is no need for Let’s Encrypt if you choose this option.
There isn’t much else different between the cPanel / Comodo certificate and the Let’s Encrypt option, except for philosophy. Both the cPanel certificate and Let’s Encrypt are Domain Validation certificates and both have a renewal period of 90 days. Let’s Encrypt calls themselves “a free, automated, and open certificate authority” and is a non-profit, they also only offer Domain Validation certificates and do not offer other products such as Extended Validation certificates or Organization-Validated certificates. If you support open standards, then Let’s Encrypt is the choice you want to go with over the cPanel / Comodo certificate.
6. To install Let’s Encrypt for AutoSSL you’ll need to SSH into the server. If you don’t know what that means, its basically a text based way of giving your server commands. You should have SSH access if you have a server with cPanel / WHM, but you may not. Check with your hosting provider and make sure you have SSH access before continuing.
7. You’ll need to have PuTTY installed on your computer (or another SSH / Telnet client) and know your SSH credentials. Here is what PuTTY’s configuration screen looks like for reference.
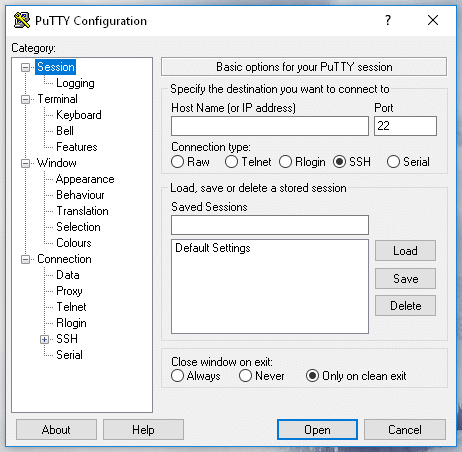
Once you sign in to the root of your server via your SSH client you’ll execute the following command in PuTTY
# /scripts/install_lets_encrypt_autossl_provider
This command installs the RPM files required for Let’s Encrypt to work with cPanel’s AutoSSL. If the command is successful you should see this notice:
Installed the cpanel-letsencrypt RPM! AutoSSL can now use Let’s Encrypt.
Here’s an official blog post from cPanel on the Let’s Encrypt module for AutoSSL. https://blog.cpanel.com/announcing-cpanel-whms-official-lets-encrypt-with-autossl-plugin/
8. Now that Let’s Encrypt for AutoSSL is installed you can update your settings to use it.
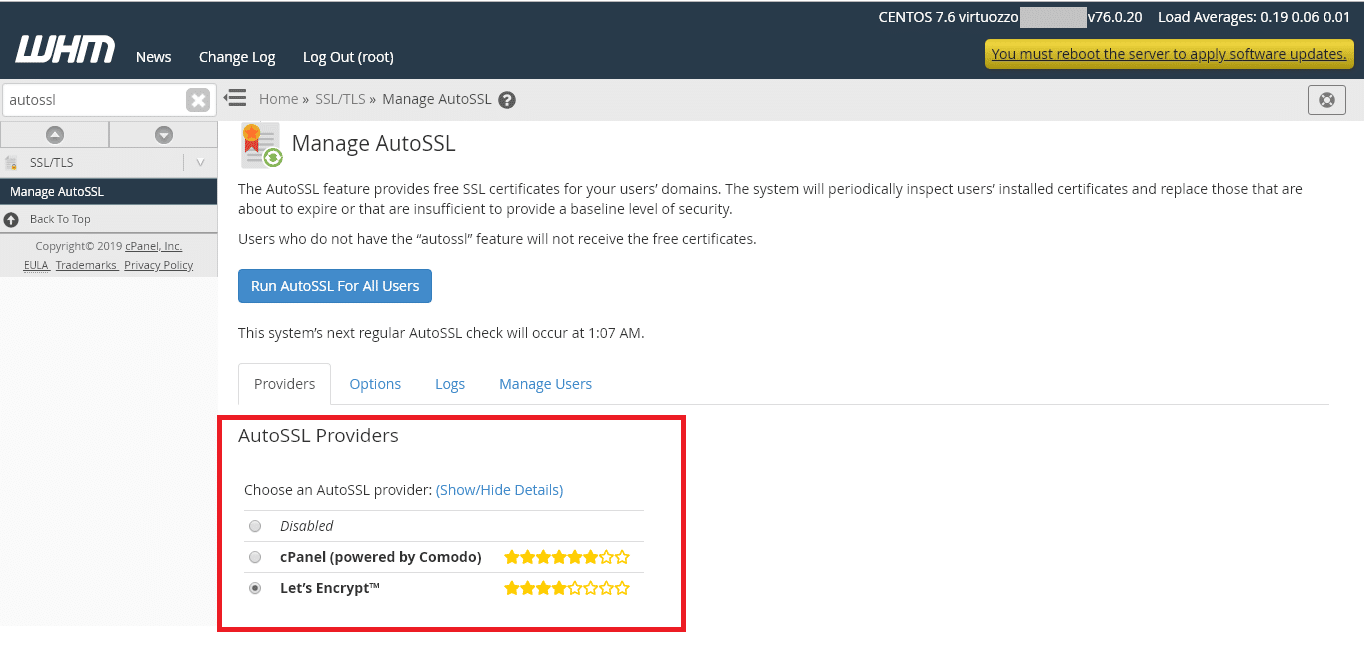
9. Once you’ve selected Let’s Encrypt for your AutoSSL any website added under this WHM account will get access to free, auto-updating SSL certificates, up to 100 certificates. It can take quite a bit for time for AutoSSL and Let’s Encrypt to sync up on your initial certificate. My experience has been anywhere from a few hours to almost an entire day. AutoSSL actually notifies you about this time, you can see that on the main page just above the listing of AutoSSL providers. In my example above the time that AutoSSL will run next is 1:07 AM. This is the time you can expect to see if the Let’s Encrypt AutoSSL worked on your domains.
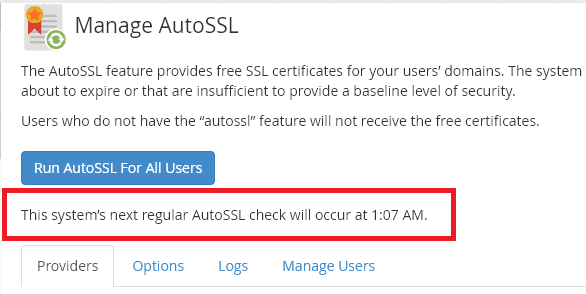
10. If you don’t wish to wait until the next regular AutoSSL check, you can force AutoSSL to run a check immediately and start the process of assigning certificates to your domains. To do this click on the large blue button on the main page of AutoSSL that says “Run AutoSSL For All Users”. This might take a few minutes depending on the number of domains on your server.
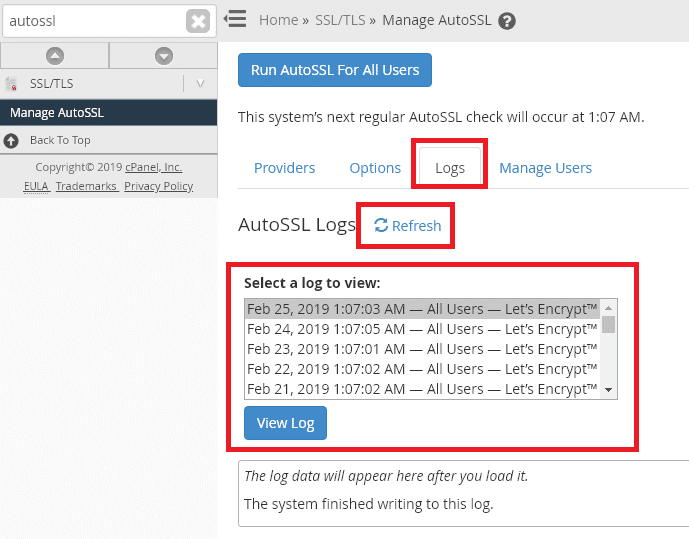
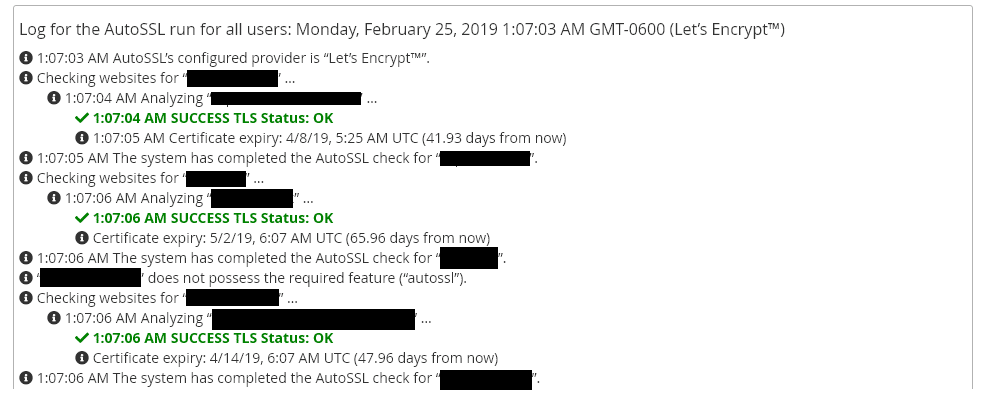
11. Finally you’ll want to make sure every domain was successfully assigned a Let’s Encrypt SSL certificate. You can check this by examining the logs. Click on the tab that says “Logs”. If you recently forced AutoSSL to run a check by following directions in Step #10 then you may not see this log listed here. Above the list of logs you’ll see the word “refresh” click this and AutoSSL will refresh the list of logs. Your most recent check should now be displayed. If everything was successful you should see the message “SUCCESS TLS Status: Ok” for each domain assigned a Let’s Encrypt SSL certificate, if you see any errors contact your hosting provider to troubleshoot them.
References
- cPanel Blog post – https://blog.cpanel.com/autossl/
- cPanel Documentation – https://documentation.cpanel.net/display/CKB/The+Let%27s+Encrypt+Plugin
- MediaTemple Help Article on Let’s Encrypt + AutoSSL – https://mediatemple.net/community/products/dv/204404604/using-ssh-in-putty-
- Liquidweb Knowledge Base Article on Let’s Encrypt + AutoSSL – https://www.liquidweb.com/kb/enabling-lets-encrypt-for-autossl-on-whm-based-servers/
- Siteground Tutorial on SSH Access – https://www.siteground.com/tutorials/whm/managing-ssh-shell-access
/